


Premium car polishing workflow: a step-by-step guide
- EVO FINISH
- May 12
- 9 min read

Your luxury vehicle deserves more than a rushed polish job. Swirl marks, micro-scratches, and fading gloss are not just cosmetic annoyances. They quietly chip away at your car’s resale value and overall appearance. We see it often: a beautifully maintained vehicle diminished by aggressive polishing, wrong pad combinations, or skipped prep steps. The good news is that a proven, methodical workflow protects that finish and keeps your paint looking showroom-fresh for years. This guide walks you through every critical stage, from gathering the right tools to applying lasting protection, so you get flawless results every time.
Table of Contents
Key Takeaways
Point | Details |
Correct technique matters | Using slow arm speed, light pressure, and proper passes prevents paint damage and produces lasting results. |
Preparation is crucial | Having the right tools and products on hand sets the foundation for a flawless finish. |
Avoid common mistakes | Over-polishing and skipping test spots are the biggest risks to luxury car paint. |
Professional help pays off | Premium detailing services can maximize your car’s gloss and protect its value. |
What you need for a premium car polishing workflow
Now that you know what to expect from a high-level workflow, let’s gather the right tools and products for the job. Having the correct equipment is not optional with luxury vehicles. The wrong machine or pad can create problems far more costly than the ones you set out to fix.
Choosing your polishing machine
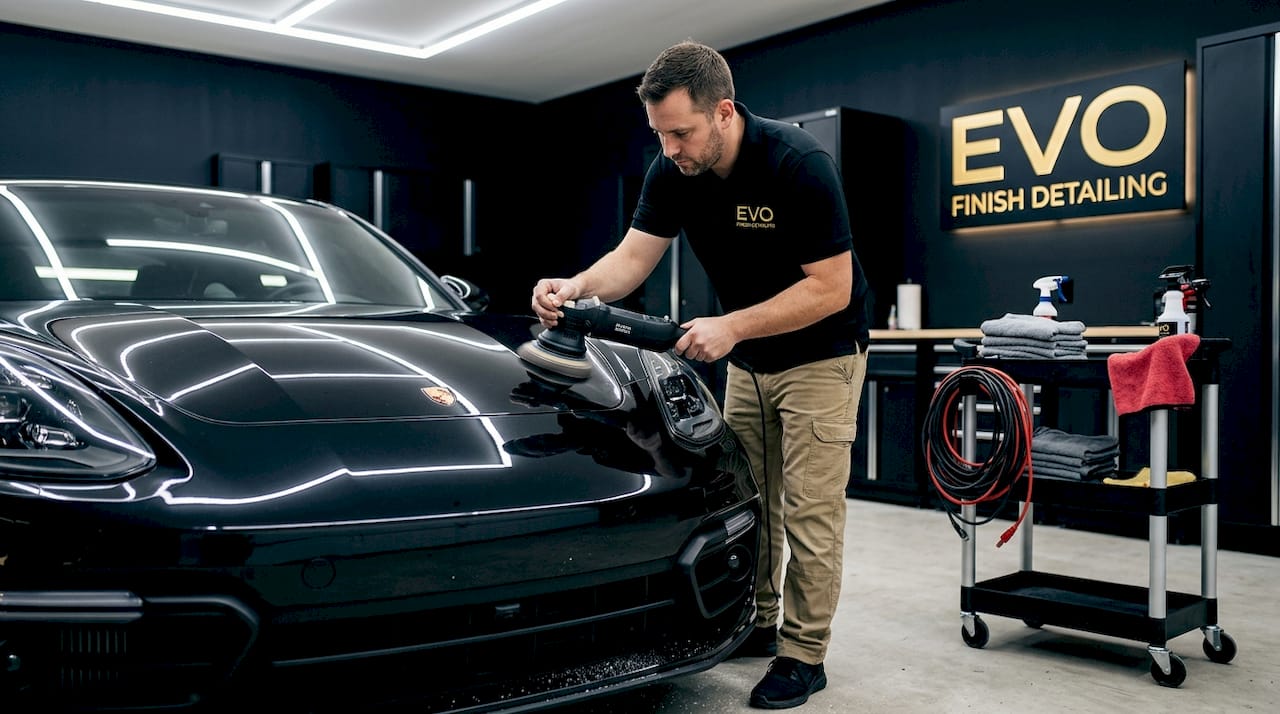
The machine you use determines how much heat and friction you apply to the clear coat. A dual-action (DA) polisher is the right choice for most enthusiasts. It oscillates and rotates simultaneously, which reduces the risk of burning through clear coat. A rotary polisher cuts faster and handles heavier defects, but it demands serious skill and experience. If you are not professionally trained, stick with a DA machine and let our exterior refinement detail process handle the heavy corrections.
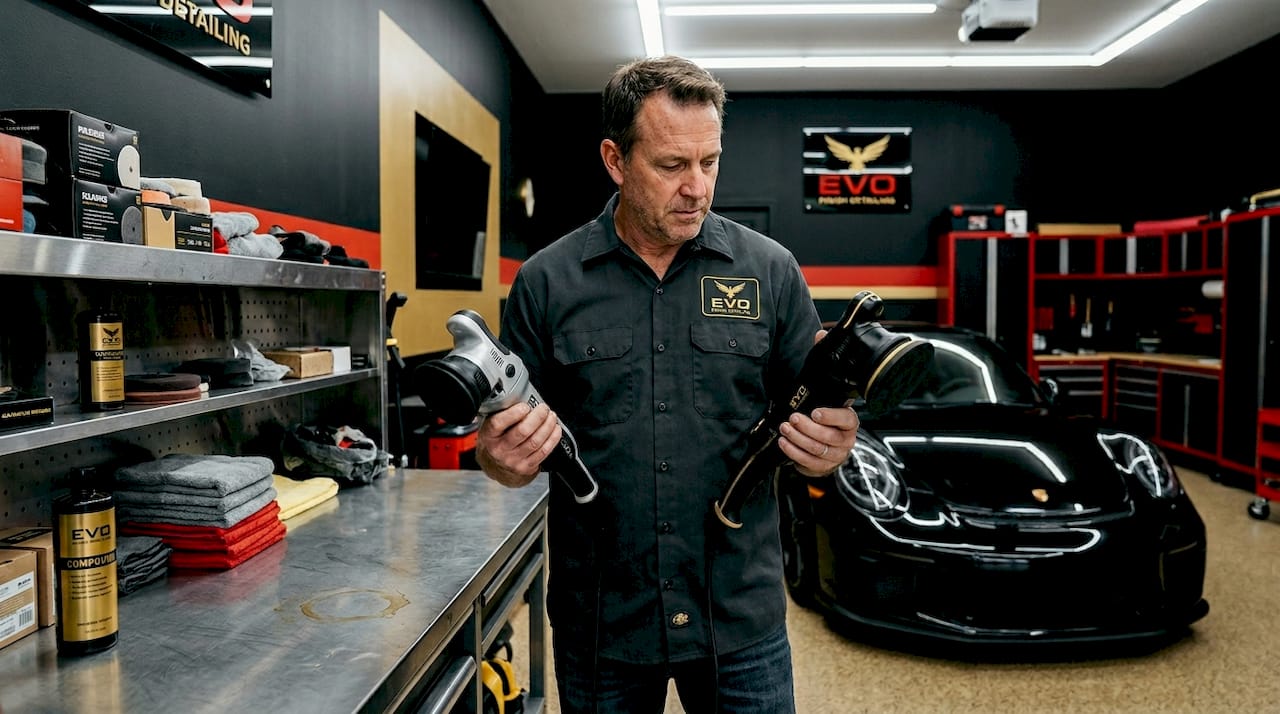
Pads, polishes, and combinations
Not all pads are the same. Here is a quick reference table to help you match the right pad with the right product:
Pad type | Aggressiveness | Best use | Polish grade |
Wool | Very high | Heavy scratch removal | Cutting compound |
Foam cutting | High | Moderate swirls and oxidation | Cutting/compound |
Foam polishing | Medium | Light swirls, haze | Finishing polish |
Microfiber | Medium-high | Versatile correction | Cutting or finishing |
Foam finishing | Low | Final gloss, pre-wax prep | Fine finishing polish |
Start with the least aggressive combination that will still get the job done. This is critical for luxury finishes where the clear coat is thinner than standard production vehicles.
Essential supplies checklist
Before you touch paint, make sure you have these items ready:
DA polisher with speed control (speed settings 1 through 6)
Multiple pads in at least two aggressiveness levels (cutting and finishing)
Isopropyl alcohol (IPA) wipe-down cloth for paint prep
Detailing clay bar for surface decontamination
LED or daylight-balanced work light to spot defects clearly
Microfiber inspection cloths (minimum 5, soft and lint-free)
Pad cleaning brush and spare pads for rotation
Masking tape to protect trim and rubber seals
Good lighting is non-negotiable. Even a high-end garage light can miss swirl marks that a proper LED inspection light will catch instantly. Set your workspace up before you open a single product.
Pro Tip: Always prime your pad with a dime-sized amount of product before you start your machine. Running a dry pad on paint even for a moment can cause uneven heat distribution and create marring. Keep a rotation of extra clean pads ready throughout the job to avoid cross-contamination between cutting and finishing stages.
Our signature complete detail uses this exact pad management approach on every vehicle we service.
Step-by-step premium car polishing process

Once your equipment is lined up, you are ready to follow these essential steps for a flawless finish. Precision and patience at each stage make the difference between a good result and a truly exceptional one.
The complete process, step by step
Wash the vehicle thoroughly. Use a two-bucket wash method with a quality automotive shampoo. Remove all dirt, bird droppings, and road film before touching paint with any machine.
Decontaminate the paint. Run a clay bar across all painted panels using a clay lubricant. This removes bonded contaminants like iron particles and industrial fallout that washing alone cannot lift.
Dry completely. Use soft, clean microfiber towels or a controlled air blower. Any water left on the surface can affect how products break down and perform.
Inspect under strong lighting. Use your LED inspection light at a low angle to map out swirl marks, scratches, and oxidized areas. Note which panels need more correction.
Tape off trim and rubber seals. Polish getting into trim gaps is difficult to remove and looks unprofessional. A few minutes of taping saves a lot of cleanup time.
Apply polish and begin machine work. Work in 2x2-foot sections. Apply a dime-sized amount of product to your primed pad. Set your DA machine to a slow speed (setting 1 or 2) and spread the product first without pressure. Then increase speed and work the section with slow arm speed and 6-8 passes per section until the product breaks down fully.
Check your results. After each section, wipe away residue with a clean microfiber cloth and inspect under your light. If defects remain, repeat once before moving on.
Apply paint protection. Finish with a quality sealant, carnauba wax, or ceramic coating to lock in your results. Check our dedicated paint correction guide for the right protection pairing for your vehicle.
Pressure and speed reference table
Stage | Machine speed | Arm speed | Pressure | Number of passes |
Spread product | 1-2 | Medium | None | 1-2 |
Correction passes | 4-5 | Slow | Light (5-10 lbs) | 6-8 |
Finishing passes | 3-4 | Slow | Very light (3-5 lbs) | 4-6 |
Final wipe down | N/A | N/A | N/A | N/A |
Critical reminder: Using light pressure, around 5-10 lbs, is not optional. Excess pressure combined with too many passes is the single fastest way to thin your clear coat beyond repair. Let the machine and the product do the work.
Pro Tip: Always test your chosen pad and polish combination on a small, inconspicuous spot first, like the lower door jamb area or behind the fuel door. If that test spot looks clean and defect-free, you are good to proceed with the rest of the panel.
Common mistakes and how to avoid them
Understanding the correct process is crucial, but knowing what to avoid is just as important to protect your vehicle’s finish. Even experienced enthusiasts make these errors, and the consequences on a luxury vehicle can be expensive.
The top mistakes we see repeatedly
Using too much pressure. Pressing harder does not polish faster. It generates excess heat and thins the clear coat, sometimes permanently. Let the machine float over the surface with only minimal downward weight from your hands.
Skipping the test spot. Many owners are eager to get started and skip this step entirely. If the product is too aggressive for that specific paint, you will find out immediately on a small area rather than across an entire hood.
Letting product dry on the surface. Polish left to harden in direct sunlight or under heat creates a residue that can leave holograms or marring when buffed off. Work in manageable sections, particularly on hot days, and never let product sit longer than 2-3 minutes.
Using dirty or glazed pads. A pad clogged with old polish loses cutting ability and becomes a heat trap. Clean your pad with a pad cleaning brush every 2-3 sections, and swap it for a fresh one when cleaning no longer restores its texture.
Over-polishing the same area. Retracing sections repeatedly without visible cause removes clear coat unnecessarily. Avoid over-polishing and only repeat a section if your inspection light confirms remaining defects.
Ignoring panel edges and curves. The paint layer is thinner at body edges, raised lines, and around wheel arches. Use hand polishing on these areas rather than a machine to avoid burning through.
Remember: Every polishing session removes a microscopic layer of clear coat. There is a finite amount of it. Restraint and precision preserve your vehicle’s long-term value. Aggressive, repeated sessions do the opposite.
Pro Tip: Wrap a small piece of masking tape around your machine’s cable about 18 inches from the head. This gives you a visual and tactile reminder to keep the cord away from painted surfaces while you work. A dragging cable can leave scratches that undo your entire effort on that panel.
What to expect: results and maintenance tips
After a meticulous polish, let’s look at how to preserve your results for the long haul. A premium polishing workflow done correctly delivers genuinely impressive results, but the finish only stays that way if your ongoing care matches the quality of the initial work.
What a proper result looks like
A successfully polished luxury vehicle will show a deep, mirror-like gloss with no visible swirl marks under direct light. Paint depth improves noticeably, and the surface should feel completely smooth to the back of your hand, even on darker panels where defects are most visible. Color saturation also increases, particularly on black, deep red, and navy finishes.
Maintenance habits that protect your investment
Wash your vehicle correctly. Use the two-bucket or rinseless wash method exclusively. Automatic car washes with spinning brushes are the leading cause of swirl marks returning within weeks of a polish job.
Apply a quality top coat regularly. A ceramic coating provides the longest lasting protection, often 2 to 5 years with proper care. A traditional carnauba wax lasts 6 to 12 weeks but applies more easily and is forgiving to maintain.
Use only clean, soft microfiber towels. Every surface contact point is a potential scratch opportunity. Rotate your microfibers frequently and wash them separately from household laundry to prevent detergent residue buildup.
Park thoughtfully. UV exposure, tree sap, and bird droppings are persistent enemies of a polished finish. Covered or shaded parking extends your results significantly.
Schedule professional detailing every 6 to 12 months. This is the maintenance interval we recommend for luxury vehicles. Our maintenance detailing plans are designed specifically to protect your investment between full polishing sessions.
Pro Tip: Use a dedicated quality microfiber towel for every touch point, including drying, product removal, and quick detailer sprays. Color-coding your towels by use (for example, yellow for drying, blue for product removal) prevents cross-contamination and makes maintaining a pristine finish far more consistent.
The overlooked truth about premium car polishing for enthusiasts
Having reviewed the workflow and care plan, there is something important to address about the broader philosophy of car polishing for luxury vehicles. Conventional wisdom in car care circles says that frequent polishing keeps paint looking its best. We respectfully disagree, particularly when it comes to high-end and exotic vehicles.
More polishing is not always better. In fact, for luxury finishes with thinner factory clear coats, polishing too often is one of the most damaging things an owner can do. Each session, regardless of how carefully executed, removes a thin layer of clear coat. Do this four or five times a year and you will notice the depth of your paint starting to flatten. Do it for a decade and you may be looking at a full respray rather than a maintenance detail.
The smarter approach is restraint paired with precision. Polish when correction is genuinely needed. In between, focus on protection and careful washing. A single high-quality polishing session followed by a ceramic coating and consistent maintenance will outperform three to four rushed polish sessions every year. We have seen this play out on vehicles with over 100,000 miles that still look extraordinary because their owners polished selectively and protected aggressively.
There is also the question of knowing your limits. A DA polisher in careful hands handles light swirls reliably. But heavy scratches, paint transfer, or oxidation on exotic finishes genuinely require professional-grade knowledge and equipment. Attempting aggressive correction without the right training often causes more damage than the original defect. Our expert detailing insights page shows what a truly professional correction can achieve. The difference is not just visual. It is measurable in clear coat thickness, paint depth, and the long-term preservation of your vehicle’s finish.
The most effective approach combines your careful day-to-day maintenance with periodic professional care. Thoughtful maintenance is as important as technique. Sometimes the most skilled thing you can do is recognize when to put the machine down and call in a professional.
Experience a truly premium finish with Evo Finish
For owners who demand unsurpassed quality and care, professional services are the gold standard. You have invested significantly in your vehicle. Protecting that investment requires more than the right products. It requires expertise, calibrated equipment, and a meticulous eye developed through thousands of hours of hands-on experience.
At Evo Finish, we specialize in precision detailing for luxury vehicles. Our ceramic coating options deliver lasting protection that far exceeds what standard waxes or sealants can offer. From light maintenance to full paint correction, every service is performed with the care and attention your vehicle deserves. Explore our see premium plans and find the right level of protection for your specific needs. When you are ready for a flawless finish backed by guaranteed satisfaction, book premium detailing today and let us take care of the rest.
Frequently asked questions
How many passes should I make during the polishing step?
Aim for 6-8 passes per section per 2x2 foot area, using a slow arm speed and stopping once the product has fully broken down to a clear or near-clear film.
Why is light pressure important in car polishing?
Light pressure, around 5-10 lbs, ensures effective polishing action while protecting the clear coat from excessive heat and abrasion that leads to thinning or burning.
How do I know if I’m over-polishing?
Dull spots, reduced paint depth, or visible thinning in strong light are warning signs. Immediately stop if you see these symptoms, because avoiding over-polishing is essential to preserving your clear coat for future correction cycles.
Is it necessary to test a spot before polishing the whole car?
Yes, absolutely. Always test a small spot first using your intended pad and product combination to confirm it is safe and effective for your paint type before working across full panels.
Recommended
Comments