


Car Interior Detailing Checklist for a Flawless Cabin

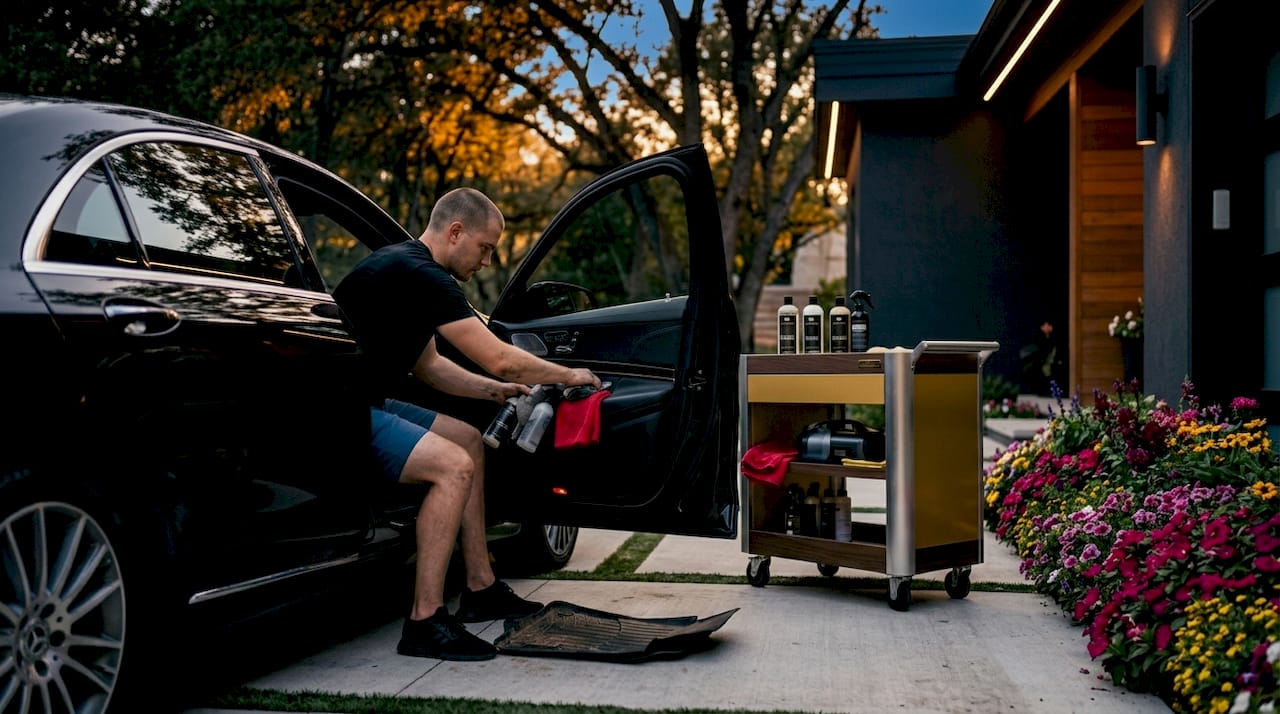
Your car’s interior takes a beating every single day. Coffee spills, muddy shoes, pet hair, and accumulated dust all chip away at both the appearance and the health of your cabin. A solid car interior detailing checklist takes the guesswork out of the process, giving you a clear, step-by-step workflow that delivers professional-level results whether you’re doing it yourself or preparing for a service visit. This guide covers every surface, every tool, and every technique worth knowing.
Table of Contents
Key takeaways
Point | Details |
Work top to bottom | Start at the headliner and work down to the floor mats to avoid recontaminating cleaned surfaces. |
Use the right products | Automotive-specific, pH-neutral cleaners protect materials better than household alternatives. |
Vacuum before any liquids | Dry vacuuming first prevents dust and debris from mixing with cleaners and leaving residue. |
Deep clean every 3 to 6 months | Professional interior detailing every 3 to 6 months maintains vehicle condition and resale value. |
Protect your investment | Regular maintenance outperforms infrequent one-off deep cleans for keeping materials in top shape. |
1. Understanding your car interior before you start your car interior detailing checklist
Before you grab a single product, take five minutes to identify what materials you’re working with. Leather, fabric, vinyl, alcantara, and hard plastic each respond differently to cleaners and tools. Using the wrong product on the wrong surface does real damage.
Here’s what to check before starting:
Leather and leatherette: Need pH-neutral cleaners followed by a dedicated conditioner to prevent cracking
Fabric and cloth upholstery: Respond well to upholstery shampoo and benefit from stain pre-treatment before scrubbing
Hard plastic and vinyl: Durable but still susceptible to discoloration from harsh chemicals
Infotainment screens and electronics: Require a dry or barely damp microfiber cloth, never a spray directly on the surface
The auto detailing guide principle here is simple: match your product to your surface. A good all-purpose cleaner (APC) diluted to manufacturer specs handles most hard surfaces. For everything else, use a product formulated for that specific material.
Pro Tip: Check for a small label on your seat bolster or floor mat to identify manufacturer-specified materials. This single step prevents costly cleaning mistakes.
DIY supply costs for a proper interior detail run $200 to $500 as of 2026 for quality startup supplies, including a vacuum, microfiber towels, brushes, APC, glass cleaner, and leather conditioner.
2. Gather your supplies
A thorough detail requires the right tools. Using a single cloth for every surface is one of the most common mistakes car owners make. Color-code your microfiber towels to prevent cross-contamination between surfaces.
Your core supply list:
Wet/dry vacuum with crevice and brush attachments
Multiple microfiber towels (separate sets for glass, surfaces, and leather)
Soft-bristle brush for delicate surfaces like dashboards and vents
Stiff-bristle brush for floor mats and carpet seams
All-purpose cleaner (APC) diluted appropriately
Upholstery shampoo or foam cleaner
Leather cleaner and conditioner
Automotive glass cleaner
UV protectant for plastic and vinyl surfaces
Cotton swabs and detailing brushes for tight spaces
Multiple brush types combined with specialized vacuum attachments dramatically improve cleaning depth and speed. This is one place where spending a little more on quality tools pays off in results.
3. Clear out the cabin
Remove everything from the interior before touching a single surface. Floor mats come out first. Then remove any personal items, trash, car seats, and accessories. Empty the center console and glove box completely.
This step matters more than most people give it credit for. Cleaning around items means you’ll miss debris trapped underneath them. Once everything is out, do a quick visual inspection of the entire cabin to identify stains, odors, or problem areas that need extra attention.
4. Vacuum first, always
Professional detailers vacuum without liquids first to prevent dust and debris from mixing with cleaning products, which creates residue buildup that is harder to remove than the original dirt.
Start at the headliner if there’s visible debris. Then move to the seats, moving from the top to the bottom cushion. Use a crevice tool along every seam. Seat tracks and undersides collect significant pet hair and debris and are often skipped entirely. Use a narrow crevice attachment to clean these hidden areas before doing anything else.
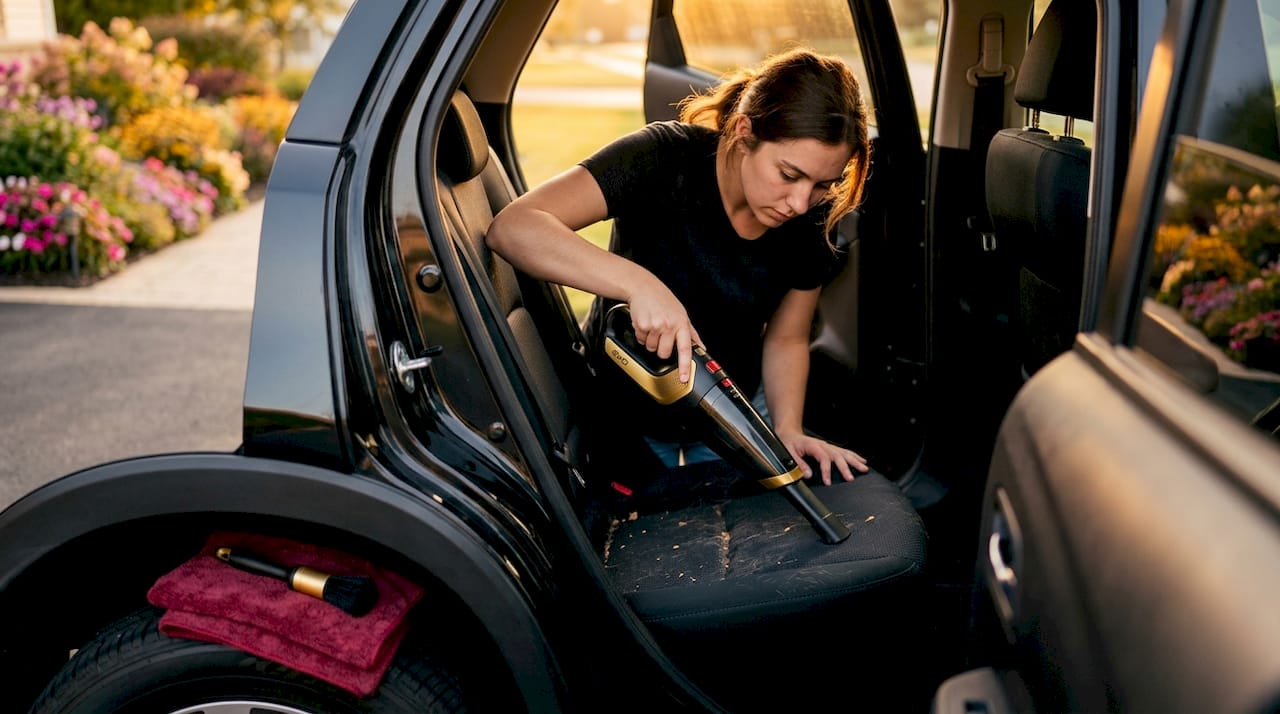
Finish vacuuming with the floor carpet and floor mats. Take your time. A rushed vacuum pass leads to a mediocre final result regardless of how well you clean the surfaces afterward.
Pro Tip: Use a rubber glove or a silicone brush to agitate and pull pet hair from carpet and fabric seats before vacuuming. Pet hair grabs onto fibers and a vacuum alone won’t always dislodge it.
5. Clean hard surfaces from top to bottom
Follow the top-to-bottom workflow that prevents cleaning cross-contamination and maximizes efficiency. Start at the headliner, move to the sun visors, then the A, B, and C pillars. Work your way down to the dashboard, instrument cluster surround, steering wheel, center console, door panels, and finally the lower kick panels.
Never spray liquid cleaners directly onto your dashboard or electronics. Always apply product to a microfiber cloth first, then wipe. For tight spaces and air vents, use a soft-bristle detailing brush or cotton swabs. A can of compressed air works well for blowing debris out of vents before wiping them down.
For the steering wheel, use an APC at a light dilution and a medium-bristle brush to agitate the texture. This is a high-touch surface and deserves thorough attention.
6. Treat fabric upholstery and carpet
Apply your upholstery shampoo or foam cleaner to problem areas first and let it dwell for two to three minutes before scrubbing. Use a medium-bristle brush in overlapping circular motions. Wipe away foam and residue with a clean microfiber towel.
For stains, pre-treat with a targeted stain remover and let it sit before agitating. Never scrub a stain aggressively on the first pass. Work from the outside of the stain inward to prevent spreading.
Deep cleaning with steam and upholstery shampoo removes trapped bacteria, allergens, and odors that vacuuming simply cannot reach. If you have pets or children in your vehicle, this step is non-negotiable for a genuinely clean interior. For a deeper look at carpet-specific techniques, Evofinish covers car carpet deep cleaning in detail.
7. Clean and condition leather surfaces
Leather requires a two-step process: clean first, then condition. Use a dedicated leather cleaner with a soft brush or microfiber pad and work in small sections. Wipe away the cleaner completely before applying conditioner.
Apply leather conditioner in a thin, even coat. Over-applying conditioners leaves a sticky residue that attracts dirt and accelerates re-soiling. Less is more. Buff lightly with a clean microfiber towel until the surface feels supple but not greasy.
This two-step process protects against cracking and fading, particularly in vehicles exposed to strong sunlight. For luxury vehicles with premium leather, Evofinish recommends reviewing premium detailing standards to understand what professional-grade care looks like.
8. Clean floor mats
Whether your mats are rubber or carpet, they need individual attention. For rubber mats, scrub with an APC and a stiff brush, rinse thoroughly, and let them air dry completely before reinstalling. Wet mats placed back in the car trap moisture and cause odors.
For carpet mats, apply upholstery shampoo, agitate with a stiff brush, and extract moisture with a wet/dry vacuum or allow adequate drying time. Reinstalling damp carpet mats is one of the fastest ways to create a mildew smell in your cabin.
9. Clean windows and mirrors
Use an automotive glass cleaner and two separate microfiber towels. Apply the cleaner with the first towel, then buff to a streak-free finish with the second dry towel. Work the windows in one direction horizontally on the inside and vertically on the outside. This makes it easier to identify which side any streak is on.
Do not forget the rear window shelf and the interior rearview mirror. These surfaces collect fine dust that reduces visibility and makes the interior look dingy even after everything else is cleaned.
10. Apply protectants and finishing touches
Apply a UV protectant to all plastic, vinyl, and rubber surfaces. Use a light application to a microfiber applicator pad, not directly to the surface. Buff to a matte or satin finish. Glossy protectants on the dashboard create distracting reflections in your windshield.
Do a final walk-around inspection of the cabin. Check under seats for missed debris, confirm all surfaces are dry before closing up the vehicle, and replace floor mats only when fully dry. A final pass with a clean dry microfiber on hard surfaces picks up any remaining lint or smearing.
Comparing interior detailing methods and products
Method | Best for | Drawback |
Dry vacuuming | Routine maintenance, debris removal | Does not remove bacteria or deep stains |
Steam cleaning | Deep sanitation, odor elimination | Requires equipment and drying time |
Upholstery shampooing | Fabric stains and embedded dirt | Can over-wet if not extracted properly |
Leather cleaning and conditioning | Leather and leatherette surfaces | Requires correct product match |
UV protectant spray | Plastic and vinyl preservation | Overuse creates greasy buildup |
Common household cleaners carry chemicals that damage modern vehicle materials. Stick to automotive-specific products to protect both delicate fabrics and hard surfaces. For odor elimination in vehicles affected by spills, pets, or smoke, professional detailing removes odors through deep cleaning and sanitization rather than simply masking them with fragrance.
Maintenance schedule and situational tips
Consistency beats intensity. A quick weekly touch-up takes fifteen minutes and prevents the kind of buildup that turns into a three-hour deep clean.
Weekly: Remove trash, wipe down the steering wheel and console, shake out floor mats
Monthly: Full vacuum, glass cleaning, wipe all hard surfaces with APC
Every 3 to 6 months: Full deep clean following this checklist, plus leather conditioning and protectant application
Pet owners: Vacuum weekly and use a rubber brush before every vacuuming session
Smoker vehicles: Use an odor eliminator with an activated charcoal base in addition to standard cleaning; surface cleaners alone won’t fix smoke penetration
Heavy-use and commercial vehicles: Consider a professional detail every 6 to 8 weeks to maintain interior condition
Keep your supplies organized and accessible. Detailing products stored in a cool, dark space last longer and stay effective. A simple plastic bin in your garage with everything in one place removes the friction that causes most people to skip maintenance sessions. This approach also reflects what a solid checklist for mobile detailing van operation uses to stay organized and consistent.
What I’ve learned from doing this work every day
I’ve detailed hundreds of vehicles at this point, and I keep seeing the same mistakes over and over. The biggest one is skipping the pre-vacuum and going straight to liquids. The second is using too much product. People assume that more cleaner means cleaner results. It doesn’t. It means more residue, more buffing, and more wasted product.
The other thing I’ve noticed is that car owners underestimate how much the top-to-bottom sequence matters. I’ve watched people clean the carpet beautifully and then knock dust off the dashboard onto it. That sequence issue alone can double your cleaning time.
What actually delivers lasting results is not one massive annual clean. It’s consistent fifteen-minute weekly passes. Your interior never gets bad enough to require the heavy intervention, and the materials stay in better condition over time because they’re not being stripped and saturated repeatedly.
One more thing I want to emphasize: product misuse is the number one source of interior damage I see. Household glass cleaner on a touchscreen, ammonia-based products on leather, bleach wipes on vinyl. Always check the label and always test in an inconspicuous area first. The best detailing supplies are ones matched precisely to the surface they’re cleaning.
— EVO
Get a flawless interior with Evofinish mobile detailing
You now have a complete car interior detailing checklist to work from. But sometimes the job calls for professional hands. A professional interior detail typically takes 3 to 5 hours to complete properly on a standard vehicle. That’s time and effort we handle for you.
At Evofinish, we come to you. Our mobile detailing service brings precision-level interior care directly to your driveway, office, or wherever your vehicle is parked. Every detail is meticulous, from steam-cleaned vents to conditioned leather and streak-free glass. We back every service with guaranteed satisfaction because we know what a truly clean interior looks and feels like. Ready to experience it? Book your detail today and let us take care of the rest.
FAQ
How often should I detail my car’s interior?
Industry experts recommend a professional-grade interior detail every 3 to 6 months, depending on how heavily the vehicle is used. Weekly quick-clean sessions keep maintenance manageable between deep cleans.
Can I use household cleaners on my car interior?
No. Household cleaners contain harsh chemicals that can damage vehicle materials including leather, vinyl, and fabric. Always use automotive-specific, pH-neutral products formulated for each surface type.
What is the correct order to detail a car interior?
Start with vacuuming from top to bottom before applying any liquids. Then clean hard surfaces, treat upholstery, condition leather, clean glass, and finish with protectants. This sequence prevents cross-contamination and wasted effort.
Does vacuuming alone deep-clean a car interior?
No. Vacuuming is insufficient for thorough interior sanitation. Steam cleaning and upholstery shampooing are necessary to remove bacteria, allergens, and embedded odors that surface vacuuming cannot reach.
How do I get rid of odors in my car?
Surface cleaning alone won’t fix persistent odors from smoke, pets, or spills. Professional detailing eliminates odors through deep cleaning and sanitization rather than masking them with fragrance sprays.
Recommended
Comments